引言
之前,我们完成了tomcat解析Http请求,并将其封装成HttpServelet。这次,我们补全剩余的工作,支持动态加载自定义的servlet文件。
这个项目主要是为了学习,所以我们也只需要模拟这个主流程,项目地址
首先回忆一下我们如何部署我们的代码到tomcat上的,将项目打包成war包(例如app.war),放到tomcat中的webapps的文件夹下,然后启动就可以了。启动之后,我们发现tomcat会将app.war自动解压成一个文件夹/app,文件夹里面有个classes目录放着所有的servlet文件。
那么问题不就很简单了吗?我们需要首先定位到我们的webapps目录下,然后加载里面的类就行了。
加载servlet
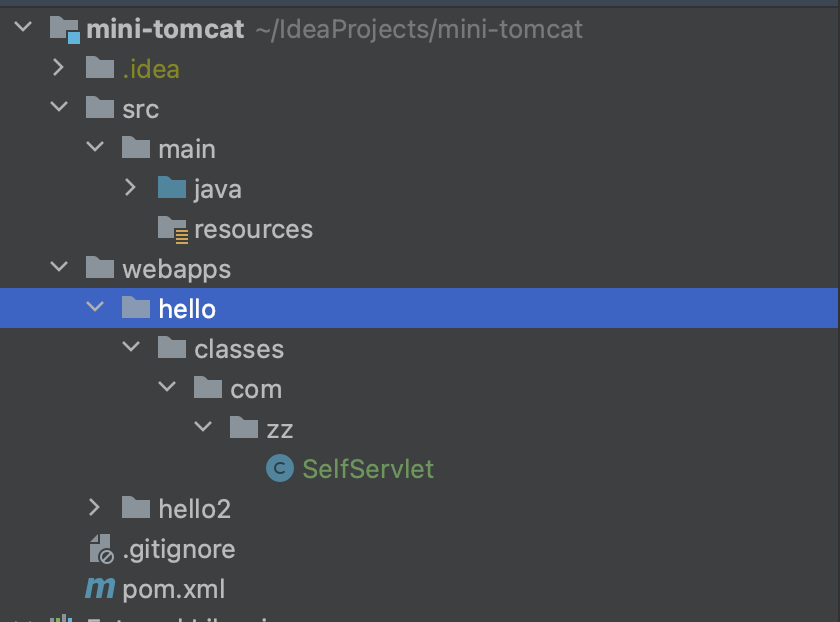
首先看下项目结构,和上次相比增加了一个webapps目录,然后在里面添加了一些文件,模拟用户部署的场景。
我们需要在tomcat启动之前进行加载的过程,因此在tomcat启动类前加入一个部署的过程。
    public static void main(String[] args) {
        Tomcat tomcat = new Tomcat();

        tomcat.deployApps();
        tomcat.start();
    }

    private void deployApps() {
        //user.dir获取当前的工作目录,在进入其子目录webapps
        File webapps = new File(System.getProperty("user.dir"), "webapps");
        for (String appName : webapps.list()) {

            deployApp(webapps, appName);
        }
    }

/**
     * 部署app
     * @param webapps webapps目录
     * @param appName webapps下面的目录
     */
private void deployApp(File webapps, String appName) {
                //创建一个项目的上下文,用于保存这个项目下url和servlet的映射关系
        Context context = new Context(appName);
        System.out.println(webapps.toString());

        //1.找到当前目录下有哪些servlet
        File appDirectory = new File(webapps, appName);
        File classesDirectory = new File(appDirectory, "classes");
        System.out.println(classesDirectory);
                //找到所有的class文件
        List<File> allFiles = getAllFileFromAbsolutePath(classesDirectory);
        for (File file : allFiles) {
            //加载servlet类

            //将/com/zz/t.class---> com.zz.t
            String name = file.getPath();
            //当前系统的文件分割符号
            String separator = File.separator;
            name = name.replace(classesDirectory.getPath()+separator, "");
            name = name.replace(".class", "");
            name = name.replace(separator, ".");

            System.out.println(name);

            //使用类加载器加载类
            Class<?> servletClazz = null;
            try {
                //注意不能使用当前线程的类加载器,因为我们要加载的文件不属于tomcat的工程,所以会提示找不到,这个时候只能使用自定义的类加载器
                //servletClazz = Thread.currentThread().getContextClassLoader().loadClass(name);
                WebAppClassLoader webAppClassLoader = new WebAppClassLoader(new URL[]{classesDirectory.toURL()});
                servletClazz = webAppClassLoader.loadClass(name);
                System.out.println(servletClazz);
                                //判断类是否继承HttpServlet
                if(HttpServlet.class.isAssignableFrom(servletClazz)){
                    System.out.println(servletClazz);
                      //判断是否有WebServlet注解
                    if(servletClazz.isAnnotationPresent(WebServlet.class)){
                        WebServlet annotation = servletClazz.getAnnotation(WebServlet.class);
                        String[] strings = annotation.urlPatterns();

                        for (String urlPattern : strings) {
                              //将满足条件的servlet加入映射
                            context.addUrlPatternMapping(urlPattern, (Servlet) servletClazz.newInstance());
                        }
                    }

                }

            } catch (MalformedURLException e) {
                throw new RuntimeException(e);
            } catch (ClassNotFoundException e) {
                throw new RuntimeException(e);
            } catch (InstantiationException e) {
                throw new RuntimeException(e);
            } catch (IllegalAccessException e) {
                throw new RuntimeException(e);
            }

        }

        contextMap.put(appName, context);
    }
部署过程非常简单,具体可以看下代码。我这里简单解释下,就是寻找在webapps下面的所有的servlet,然后将他们加载进来;然后,在更加app名称,url地址进行一个分类,建立url和servlet的映射着一点非常重要。
部署完成之后,我们就需要修改我们之前的代码,将原来的硬编码创建servlet修改成使用加载的servlet在执行接受请求和发送响应。
...
  //            //这里自定义Servlet模拟用户写的servlet,暂时没写到tomcat加载webapps的servlet出此下策
//            SelfServlet selfServlet = new SelfServlet();
//            selfServlet.service(request, response);

            //通过url 找到对应的servlet
            String requestUrl = request.getRequestURL().toString();
            System.out.println("requestUrl = " + requestUrl);
            requestUrl = requestUrl.substring(1);
            String[] part = requestUrl.split("/");
            String appName = part[0];
            if(part.length>1){
                String urlPattern = part[1];

                Context context = tomcat.getContextMap().get(appName);
                if(context != null){
                    Servlet servlet = context.getByUrlPattern(urlPattern);
                    if(servlet != null){
                        servlet.service(request, response);
                        //发送响应
                        response.complete();
                    }else{
                        //servlet为空,搞一个默认的servlet
                        DefaultServlet defaultServlet = new DefaultServlet();
                        defaultServlet.service(request,response);
                        //发送响应
                        response.complete();
                    }
                }
            }
...
这里很简单了,通过我们请求的url查找到相应的servelt,如果找不到就用默认的servlet处理。
测试一下,发现能够正常的返回。然后,我们还可以在webapps下重新部署一个工程在进行测试,看能不能正常返回。
自此,项目完结。实际上的tomcat比这个复杂很多,我这里只是为了学习做的一个toy project,能够让我理清脉络,不用迷失在繁杂的细节中。