引言
我们上一篇文章中,已经完成了如何通过配置指定的包路径扫描下面的所有的文件,并将@Component注解标注的类找出来,下一步其实就是实例化这个bean。但是,在Spring却没有直接这么做,而是通过BeanDefinition实现的,至于为什么,容我先卖个关子。
本文所有的代码都在这个项目工程里,大家需要的时候可以随时取用。传送门
具体实现
首先我们创建一个注解,@scope用于标识bean是否是单例,代码如下:
@Target(ElementType.TYPE)
@Retention(RetentionPolicy.RUNTIME)
public @interface Scope {

    /**
     * define bean is singleton or prototype
     * @return
     */
    String value() default "";
}
我们自定义一个BeanDefinition类,用于表示我们要注入的类的结构,我们简单一些,只定义两个属性,具体如下:
package com.zhu.spring;

public class BeanDefinition {
    //类
    private Class type;
        //单例还是多例,singleton单例,prototype多例
    private String scope;

    public Class getType() {
        return type;
    }

    public void setType(Class type) {
        this.type = type;
    }

    public String getScope() {
        return scope;
    }

    public void setScope(String scope) {
        this.scope = scope;
    }
}
同时修改MiniSpringApplicationContext代码,用于创建BeanDefinition,具体如下:
package com.zhu.spring;

import java.io.File;
import java.net.URL;
import java.util.Map;
import java.util.concurrent.ConcurrentHashMap;

public class MiniSpringApplicationContext {

    private Class configClass;

      //新增,用于存放生产的BeanDefinition类对象
    private Map<String, BeanDefinition> beanDefinitionMap = new ConcurrentHashMap<>();

    public MiniSpringApplicationContext(Class configClass) {
        this.configClass = configClass;

        //scan the class decorate by @ComponentScan
        if(configClass.isAnnotationPresent(ComponentScan.class)){

            ComponentScan componentScanAnnotation = (ComponentScan) configClass.getAnnotation(ComponentScan.class);
            //scan path, eg: com.zhu.service
            String path = componentScanAnnotation.value();
            //  com.zhu.service  ----> com/zhu/service
            path = path.replace(".", "/");

            //find absolute path from MiniSpringApplicationContext context
            ClassLoader classLoader = MiniSpringApplicationContext.class.getClassLoader();
            // get url , /Users/knight/IdeaProjects/mini-spring/out/production/mini-spring/com/zhu/service
            URL resource = classLoader.getResource(path);

            File file = new File(resource.getFile());
            System.out.println(file);
            if(file.isDirectory()){
                File[] files = file.listFiles();
                for (File f : files) {
                    String absolutePath = f.getAbsolutePath();
                    System.out.println(absolutePath);
                    if(absolutePath.endsWith(".class")){
                        //real load class


                            // /Users/knight/IdeaProjects/mini-spring/out/production/mini-spring/com/zhu/service/UserService ---> com.zhu.service.UserService

                            //com/zhu/service/UserService
                            String className = absolutePath.substring(absolutePath.indexOf("com"), absolutePath.indexOf(".class"));

                            //com.zhu.service.UserService
                            className = className.replace("/", ".");
                            System.out.println(className);

                        try {
                            Class<?> clazz = classLoader.loadClass(className);

                            if(clazz.isAnnotationPresent(Component.class)){
                                                                //这是新增的代码
                                Component componentAnnotation = clazz.getAnnotation(Component.class);
                                  //通过注解取出bean的名称
                                String beanName = componentAnnotation.value();

                                //generate BeanDefinition
                                BeanDefinition beanDefinition = new BeanDefinition();
                                beanDefinition.setType(clazz);
                                if (clazz.isAnnotationPresent(Scope.class)) {
                                      //有scope注解,取出scope定义的范围
                                    Scope scopeAnnotation = clazz.getAnnotation(Scope.class);
                                    beanDefinition.setScope(scopeAnnotation.value());
                                }else{
                                      //没有scope注解,默认单例
                                    beanDefinition.setScope("singleton");
                                }
                                  //将beanDefinition对象放到我们创建的好的map容器中去
                                beanDefinitionMap.put(beanName, beanDefinition);
                            }

                        } catch (ClassNotFoundException e) {
                            e.printStackTrace();
                        }

                    }
                }
            }

        }

    }

    public Object getBean(String beanName){

        return null;
    }
}
至此,我们完成本次的目的。创建BeanDefinition用于保存我们需要创建的bean对象,其中还包含bean的类型、作用域等(其实,实际还有许多其他属性,我们这里只是简写)。
那么,为什么要绕一下不直接创建bean对象呢?
其实,在我看来Spring作为一个大而全的框架需要考虑很多东西,如果在这里直接实例化的话,那么其后一些操作比如说延迟初始化,bena依赖信息的处理等需要自定义的操作就不好实现了。而加上这个类,我们就可以将一些自定义的操作放到其中,在需要实例化的时候可以统一处理,比较简单明了。
这样说的有些牵强,没关系,等我们这个系列完结,就能明白为什么要这么设计了。
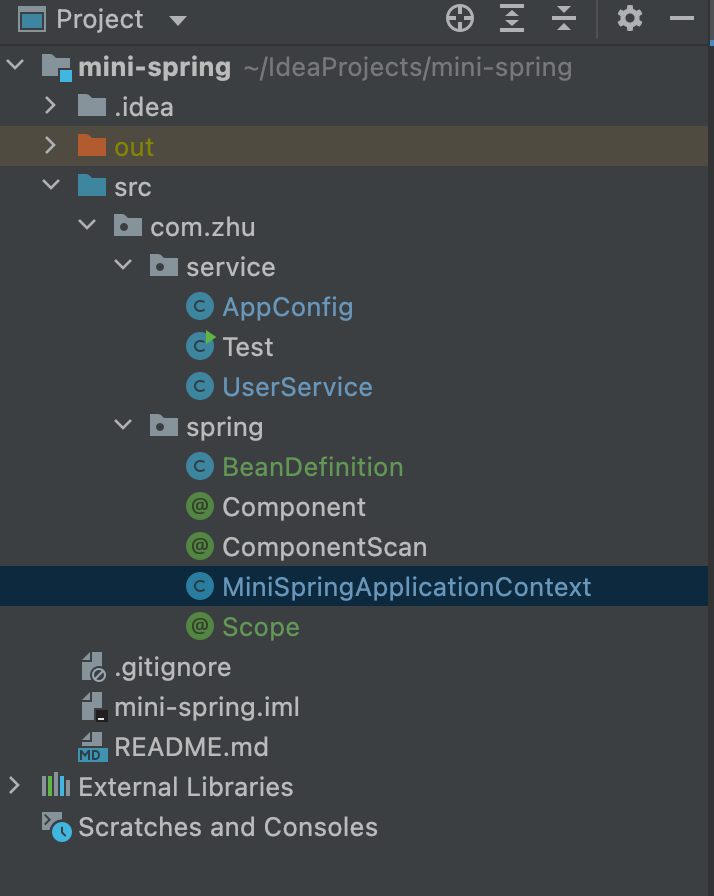
最后,我们看一眼我们的代码结构作为结束。
